Ad Demand
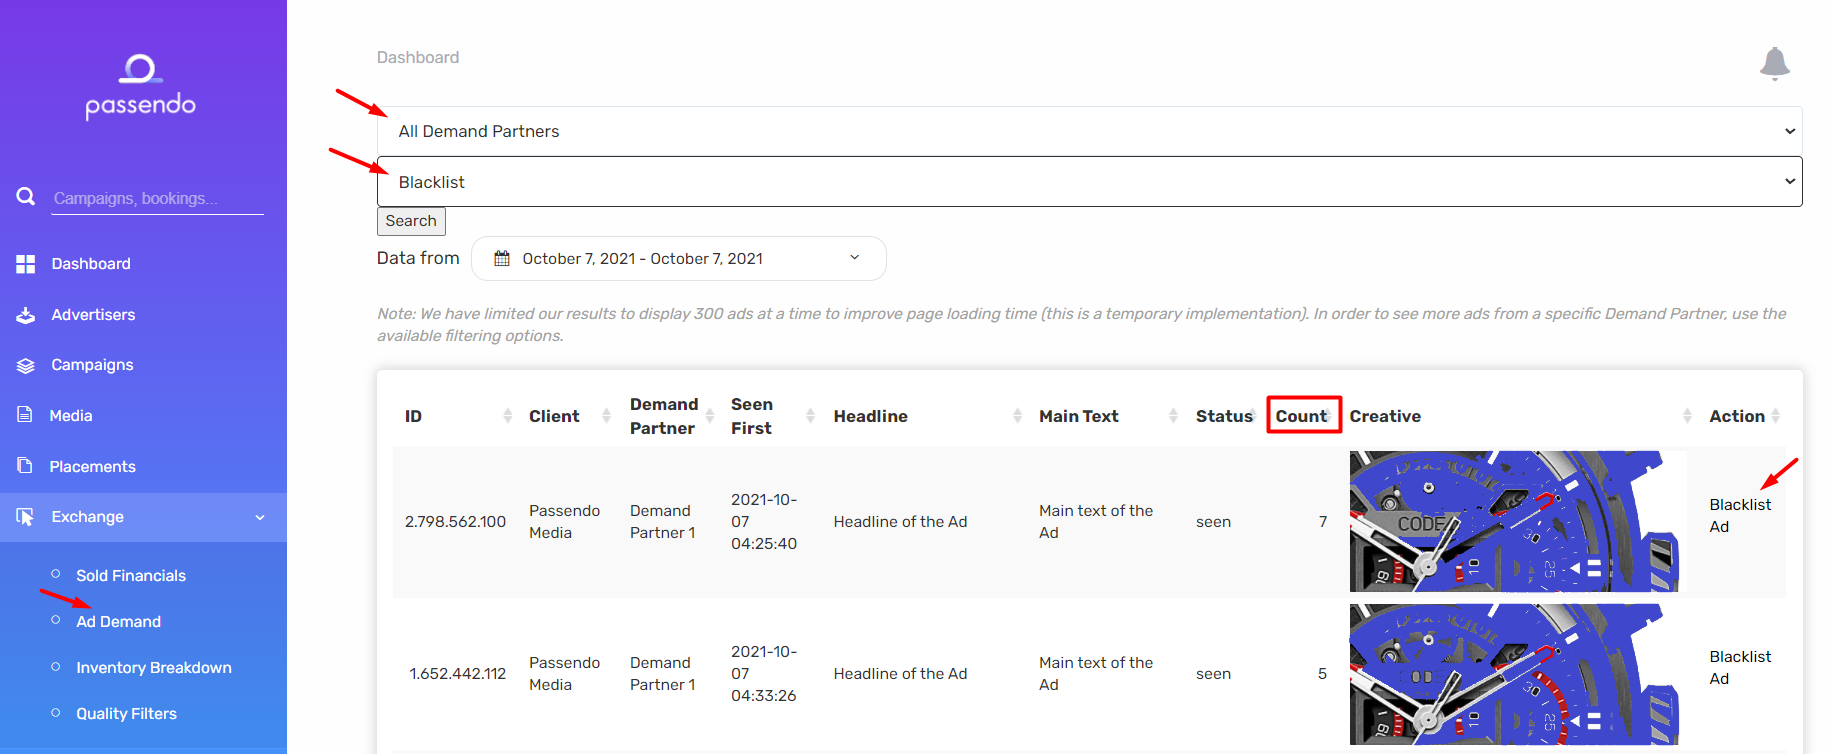
The Ad Demand interface is where you will be able to see all ads from the Exchange that are bidding, or potentially bidding, on your inventory and allow you to take action on which ads to move to your quality filter(s).
The tab provides a Dashboard with an option to select a Demand Partner as well as the Date Range that will provide you with the option to select which time/date you want.
-
Once you select the appropriate Demand Partner as well as the List (the one you previously created) that you want to check, proceed to select the Date Range that you want, then click “Search” to see the full list
-
Within the Dashboard under the column Count, you will see how many times the particular ad made a bid.
-
Once you checked the list and decided which ads you want to add to your list, you will need to click “Blacklist Ad” or “Whitelist Ad” under the “Action” column in the Dashboard. These actions will move your ads into the selected list and update the list you created under “Quality Filters”..
- If you are using a whitelist, all the ads are already automatically blocked by the system and they won't be accepted for bidding unless you whitelist them.

Custom Range is a great feature that will allow you to select appropriate dates based on your own checkup workflow. Whether you decide to check this list once per day, three times per week or weekly, Custom Range will give you the option to check the ads at your own pace.
Note: Our suggestion is that you check the Dashboard once per day or three times during the week (with the Monday date range being setup back from Friday). This way you will have full control and a much better overview of all the ads that tried to bid for your inventory, hence more control over them.
Reviewing your list
If you want to see what has been added to a blacklist or a whitelist, go back to “Quality Filters”. By clicking a list, you will be able to see ads that are currently represented on your list.
-
The green +button takes you back to the Ad Demand Dashboard from where you can blacklist or whitelist/Approve more ads.
-
If you wish to edit your blacklist or whitelist you can click the Recycle Bin icon under the Action column to permanently delete the ad from the list.
